I had quite a lot of material left over from the white maternity skirt I finished 3 days ago, and decided to make a top to go with it. I also had Wyld Man’s grandma’s 80th birthday party to go to on Saturday, I thought to quickly whip a top up. I started with a sketch.

A sketch of my maternity outfit

Deciding on the style lines of the top
I had to draft this pattern from scratch. So out came my Aldrich block.

My Winifred Alrich Close Fitting Bodice Block in size 12
I needed to trace off a block on newspaper which I could cut out and move around to determine the style lines.
If you look closely, you will see an orange line above the waist line and below the armhole line-that’s my maternity/empire waistline, under which I extend the pattern to accomodate a baby bump. Any pattern can be modified to become a maternity pattern. Just determine where the bump starts, and draw a line across-normally 2-3 inches below the bustline.

Getting ready to trace a block. Here, I layer carbon sheets on the bottom facing up, a large piece of newspaper, and the block which I want to trace off.

Laying out my trusty pattern weights.

Here you can just see the faint outline of the bodice I've traced. I'm going to cut it out.

These are the top part of the pattern above the maternity line, cut with princess seams, without seam allowances.

Here I've closed the bust dart with tape and drawn the style lines in red, which I will cut out.

Cutting out the style lines

Here I am determining the length of the back shoulder seam, and drawing the back neckline.
After cutting the style lines, I trace off the pattern pieces on a separate piece of newspaper with seam allowances.

Pattern pieces with seam allowances outlined in red.
Next, the sleeves.

This is my one-piece sleeve block from my Aldrich book without seam allowances. Single noth denotes the front, double notch denotes the back.
I wanted a slightly flared sleeve so…

I slashed the sleeve block to make a flared sleeve, and traced around the sleeve with seam allowances.
I made facings for the front and back neckline-not shown here.
The bottom front and back panels were easy-not much manipulation involved, except for the fact that I extended the front centre line by about 5 inches to gathers. However, I later found that I had made a mistake and only extended the front by 1 inch-AFTER the material had been cut-don’t know how that happened. So instead of gathers like in the sketch, I made an inverted pleat by cutting down the front centre line, and adding in a square of material into it.

Final pattern pieces all cut out.
I decided to make a muslin (test garment) to try out the fit. I only needed to try the top of the blouse, so I cut out the top part of the pattern from an old bedsheet I picked up at an opshop. In hindsight, I should have made a muslin of the whole top, in order to catch the mistake on the front bottom panels where the gathers were supposed to be.

Laying out the pattern on the op shop bedsheet for my muslin.

The cut pattern pieces for the muslin.
I tacked all the important joining points for the muslin-princess seamlines are hard to put together without them.

The finished muslin.
I tried it on and was quite happy with the fit, so I proceeded to cut it out of the white linen.

Laying out pattern pieces on the linen for cutting.

The linen material all cut out.

Tailor tacking all the points and notches to ease of joining all the pieces together EXACTLY.
Now I need to finish the edges of all the cut material.

Overlocking all the edges of the material.
I overlock all edges except the sleeve cap and the necklines on the main garment and the necklines of the facings. This is because the later seams will be enclosed, and the former will have the seam allowances trimmed off and reserged/re-overlocked.
I don’t know what I’d do without my overlocker. For one, I wouldn’t be sewing clothes at all-I’d still be stuck just sewing things like cloth nappies. I hate the look of raw unfinished edges on garments-didn’t see any point attempting to make one at all if I couldn’t finish the insides properly. And I don’t suscribe to the pink and stitch school of things.

Here I've matched tailor tacks between the front top panel with the side panel.
Tailor’s tacks makes joining princess seams sooooo easy. I used to spend ages trying to get the two opposing curves on princess seams to match. This was a cinch.

I've also made little notches on the curves of the princess seams to ease it into the opposing seam.

This is how the front top panel looks pin basted together.

Ironing out the curved seam on a rolled up nappy.

Here I've joined the armhole piece to the front top panel.
At this point, I started joining the bottom extended panel to the top, but realised that there was only 2 inches of excess material for the gathers I had intended. I decided to make an inverted pleat instead of gathers by cutting down the centre front line of the bottom panel, and adding in 10 inches of fabric for an inverted pleat. However, before I did that, I finished making up the back panel pieces.

The back panel pieces.

The 10 inch square of fabric I cut out for the inverted pleat. Had to overlock the edges of that.

This is the finished front piece with the inverted pleat at the bottom
Next, I joined the shoulder seams and the side and back seams together.
Then, the facings.

I joined the neck facings together

Joining the facings to the neckline

Trimming the seam allowances under the facings to reduce bulk-also called grading.

Here, I understitch the facing to the seam allowances to prevent the facings from turning upwards
Next up, the sleeves. Sleeve caps are normally 1-2 cms longer than the armhole length. This requires the excess fabric to be eased into the armhole. This has to be done without puckering, which is easy to do if unfamiliar with the technique outlined below.

Here I make a long running stitch between the notches on my sleeve cap and pull the threads to make a slight gather. This allows me to ease the sleeve into the armhole.

Insert the sleeve into the armhole right sides together. Pin baste from the side seams up and distribute the gathers at the sleeve cap evenly. Pin in small intervals to ensure even easing of the sleeve into the armhole and to prevent puckering.

Sew with the sleeve facing upwards and away from the needle plate.
This prevents puckers from appearing, which is easy to do if the sleeve was facing downwards while you sew it into the armhole.
I’m almost finished!

Pinning up my hem
I’m making a blind hem, which require me to fold the hem twice, once unto the wrong side 5/8 inch up, and then back onto the opposing side, just enough for the overlocked edge to show, just like in the picture.

I use my adjustable blind hem foot and set the machine to do a blindhem stitch.
I give the top a through press.
And I’m finished!
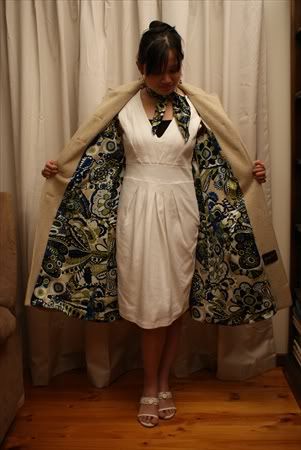
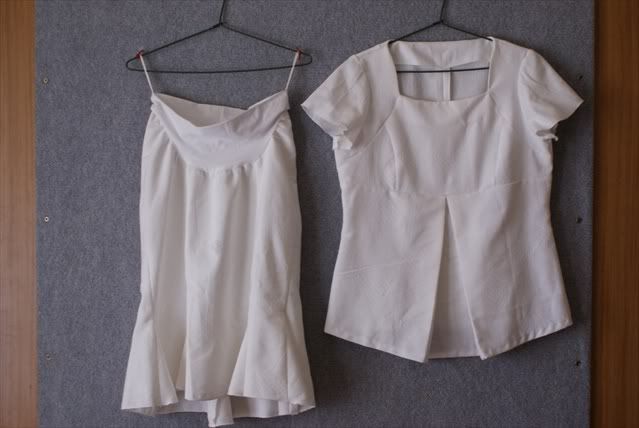
I’ve put both my maternity skirt and the top together for pictures.

Front view

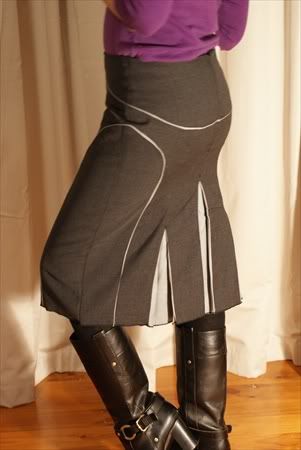
Back view.

My whole outfit
I decided that I needed a belt to break up the white-it looked a bit boring without it. But the top and the skirt are great separates for a mix and match look.


Recent Comments